🛠️ Welcome to Tech Behind Tools - Build Smart. Choose Right.
How To Apply Silicone Sealant Like A Professional
Silicone sealant is one of the most useful materials found in homes, workshops, construction projects, and renovation work. Whether you’re sealing a kitchen sink, bathroom corner, wash basin, window frame, shower enclosure, or glass partition, a properly applied silicone bead creates a waterproof and professional-looking finish that can last for years.
Unfortunately, many first-time users end up with uneven lines, excess sealant everywhere, and results that look far from professional.
The good news is that applying silicone neatly isn’t difficult. Most messy silicone jobs happen because of poor preparation, incorrect nozzle cutting, or using the wrong finishing technique.
In this guide, we’ll show you the exact methods we use, compare different application techniques, explain when to use masking tape, and share practical workshop tips that can help you achieve cleaner results with less frustration.
Quick Answer
To apply silicone sealant neatly, clean and dry the surface, prepare the cartridge correctly, cut the nozzle to the appropriate size, apply a steady bead using a caulking gun, and smooth the sealant using masking tape or a soap solution. Remove masking tape immediately after smoothing for the cleanest edges.
Project Snapshot
| Factor | Details |
|---|---|
| Difficulty | Easy |
| Time Required | 10–20 Minutes |
| Skill Level | Beginner |
| Tools Required | Caulking Gun |
| Indoor/Outdoor Use | Both |
| Cleanup Difficulty | Easy |
| Waterproof Result | Yes |
Tools & Materials You’ll Need
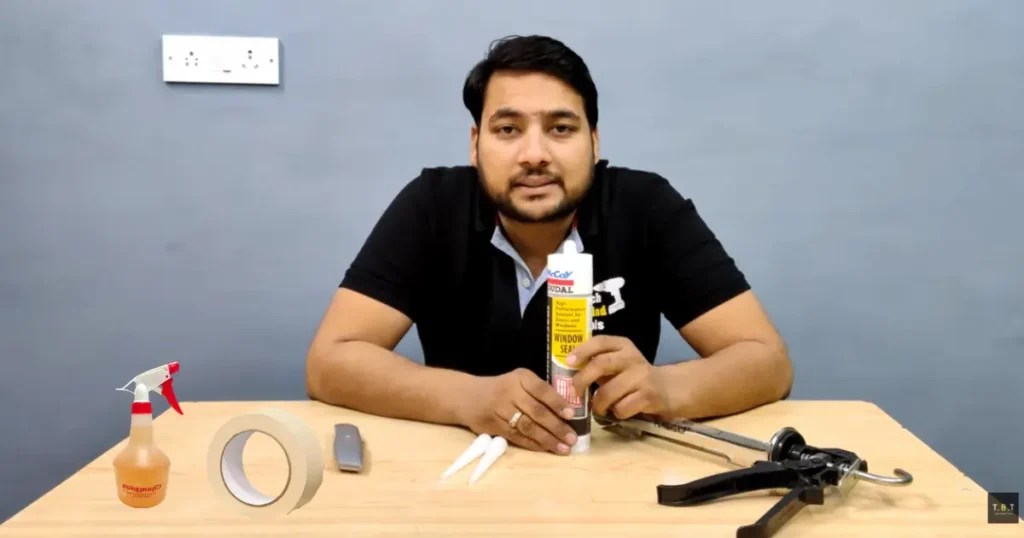
Before starting, gather the following tools and materials:
- Silicone Sealant
- Caulking Gun
- Utility Knife
- Masking Tape
- Dishwashing Liquid
- Clean Cloth
Having everything ready before you begin will make the application process smoother and help you achieve cleaner results.
Watch The Full Process In Action
Reading a guide is helpful, but watching the process can make learning even easier.
In our TechBehindTools video, we demonstrate:
- How to prepare a silicone cartridge
- Straight-cut vs 45° nozzle comparison
- Masking tape application method
- Soap solution finishing technique
- How to store partially used silicone cartridges
Before You Start
Most silicone problems occur before the sealant is even applied.
Always make sure the surface is:
- Clean
- Dry
- Free from dust
- Free from grease
- Free from loose particles
Silicone adheres poorly to dirty surfaces. Even the best sealant won’t perform properly if the surface isn’t prepared correctly.
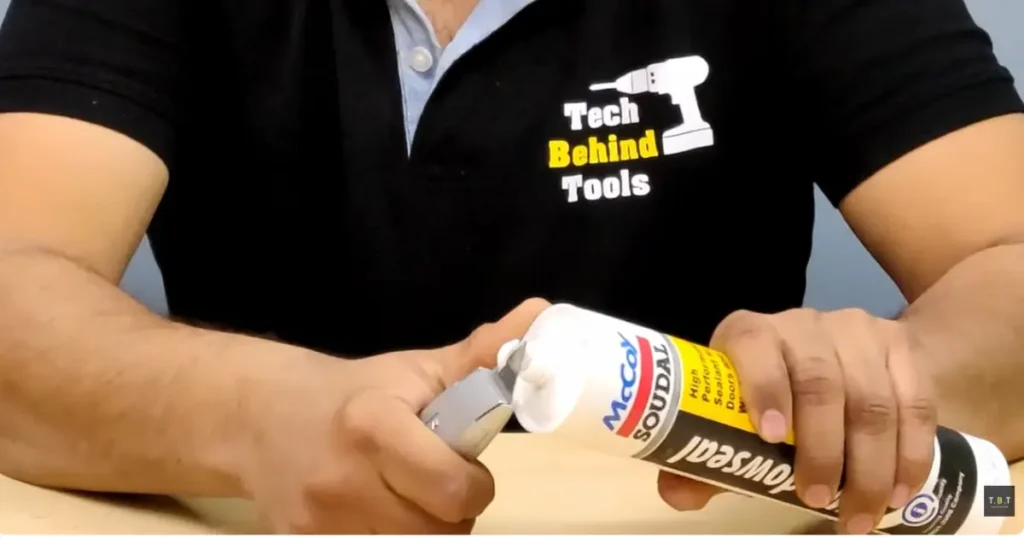
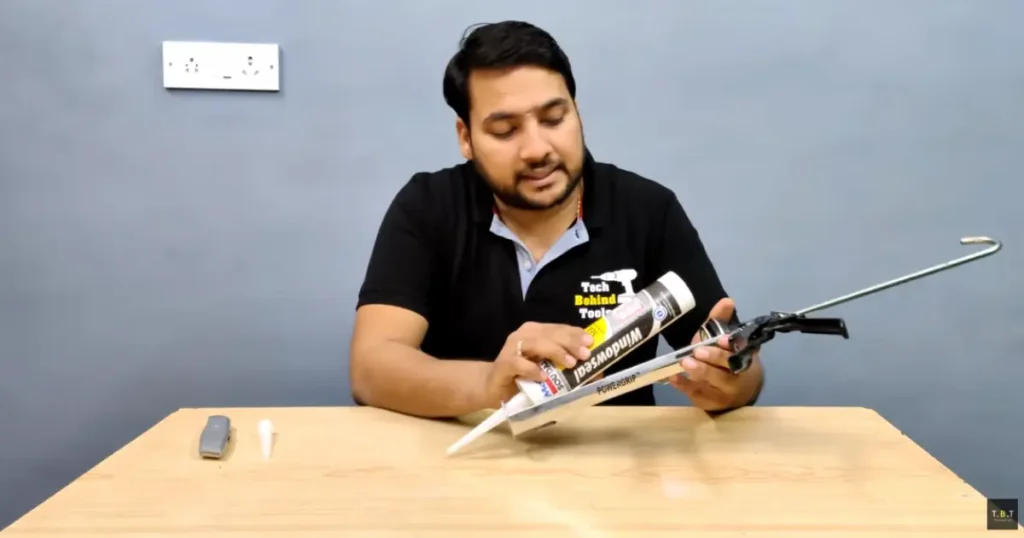
Another commonly overlooked step is cartridge preparation. Before attaching the nozzle, remove the factory seal located beneath the threaded section of the cartridge. Many people forget this step and assume the cartridge is defective when no silicone comes out.
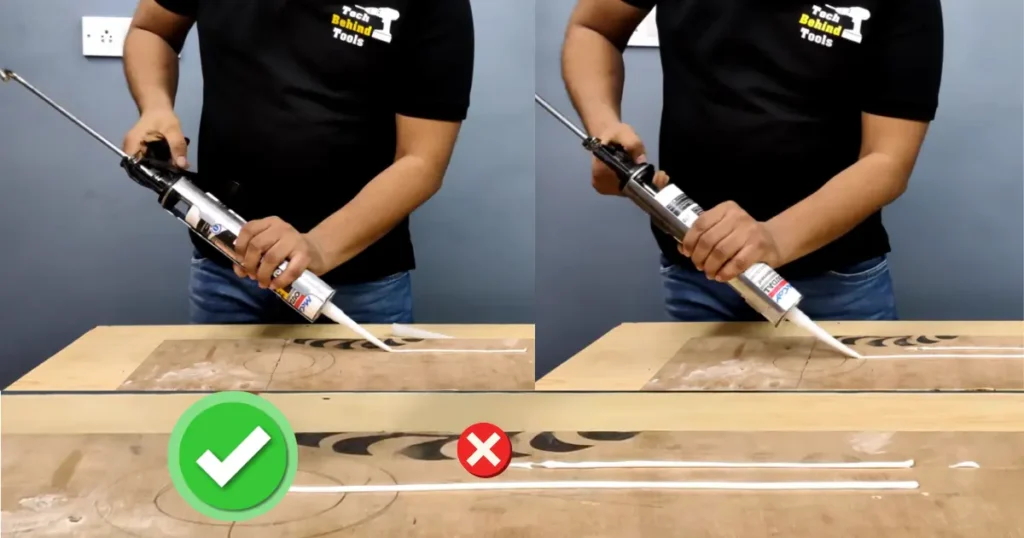
Workshop Insight: Straight Cut vs 45° Nozzle Cut
One of the most overlooked parts of silicone application is nozzle preparation.
The way you cut the nozzle affects:
- Silicone flow
- Control
- Bead size
- Ease of application
Straight Cut Nozzle
Best for:
- Small joints
- Fine finishing work
- Beginners
- Tight spaces
Advantages:
- Better control
- Lower material output
- Easier for first-time users
45° Cut Nozzle
Best for:
- Long joints
- Window frames
- Larger sealing jobs
- Faster application
Advantages:
- Smoother movement
- Better corner access
- Faster coverage
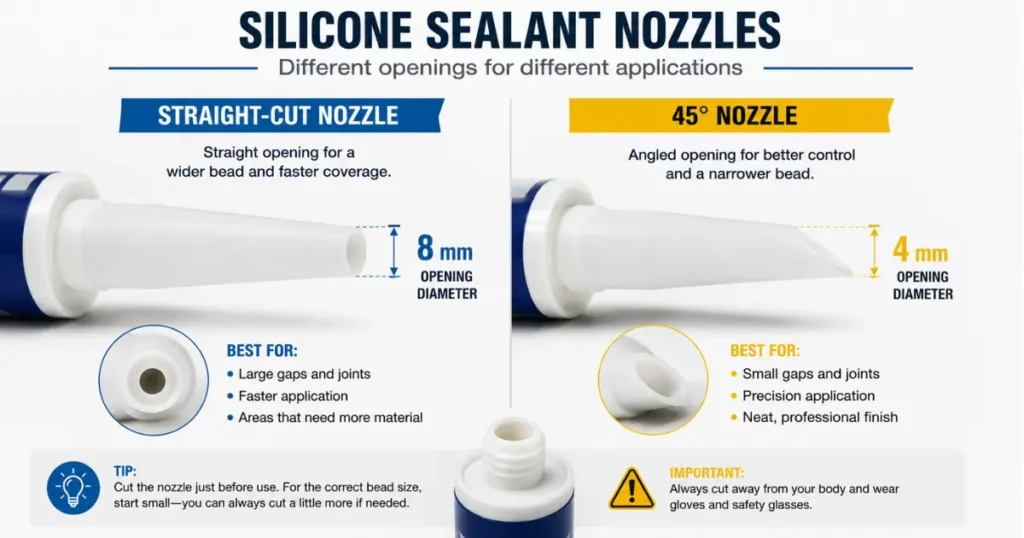
TBT Recommendation
For most DIY users, a small 45° cut provides the best balance between speed and control. Start with a smaller opening than you think you’ll need. You can always make it larger later, but you can’t make it smaller again.
How To Load A Silicone Cartridge Into A Caulking Gun
Most people struggle with a caulking gun the first time they use one. Fortunately, loading a silicone cartridge is quick and easy.
Press the release lever at the back of the gun and pull the rod fully backward. Place the cartridge into the frame and push the rod forward until it contacts the cartridge. Finally, squeeze the trigger gently until pressure builds inside the tube.
Once the cartridge is secured, you’re ready to begin applying silicone.
Method 1: The Masking Tape Technique (Best For Beginners)
If you’re new to silicone work, this is the method we recommend most.
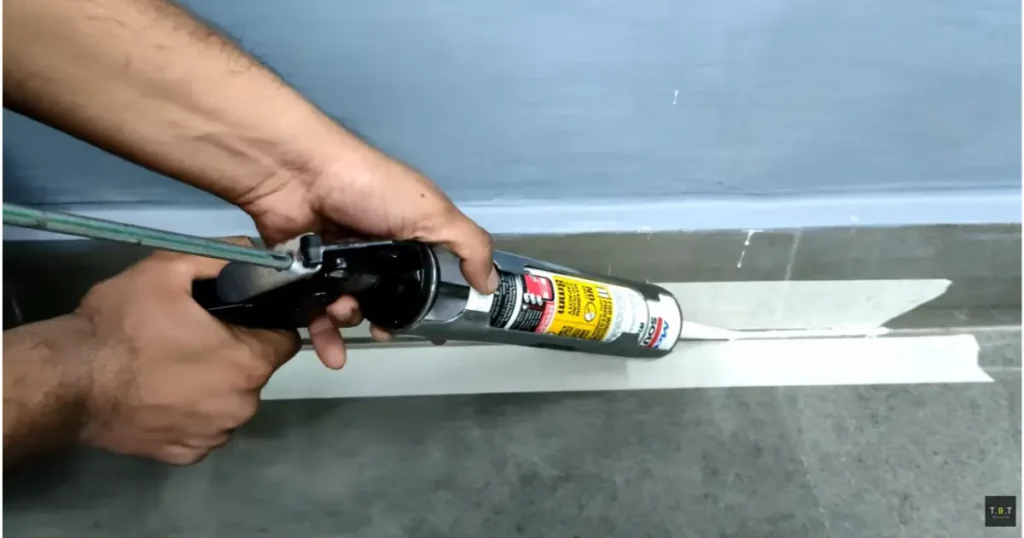
Apply masking tape on both sides of the joint, leaving a consistent gap between the tape lines. The gap determines the final width of the silicone bead.
Next, apply the silicone while holding the nozzle at approximately 45 degrees. Use steady pressure and maintain a smooth, continuous movement.
Once the bead has been applied, smooth it using a silicone finishing tool or your finger. Apply light and even pressure.
Finally, remove the masking tape immediately while the silicone is still wet. Waiting too long can damage the finished bead.
TBT Result
The masking tape method consistently produces the cleanest results and is ideal for visible joints around sinks, countertops, wash basins, and bathrooms.
Method 2: Soap Solution Finishing Method
Many experienced installers use a diluted soap solution to shape silicone quickly.
To prepare the solution, simply mix water with a small amount of dishwashing liquid.
Apply the silicone bead normally. Then dip your finger into the soap solution and run it gently across the bead.
The solution helps create a smoother finish while preventing silicone from sticking to your skin.
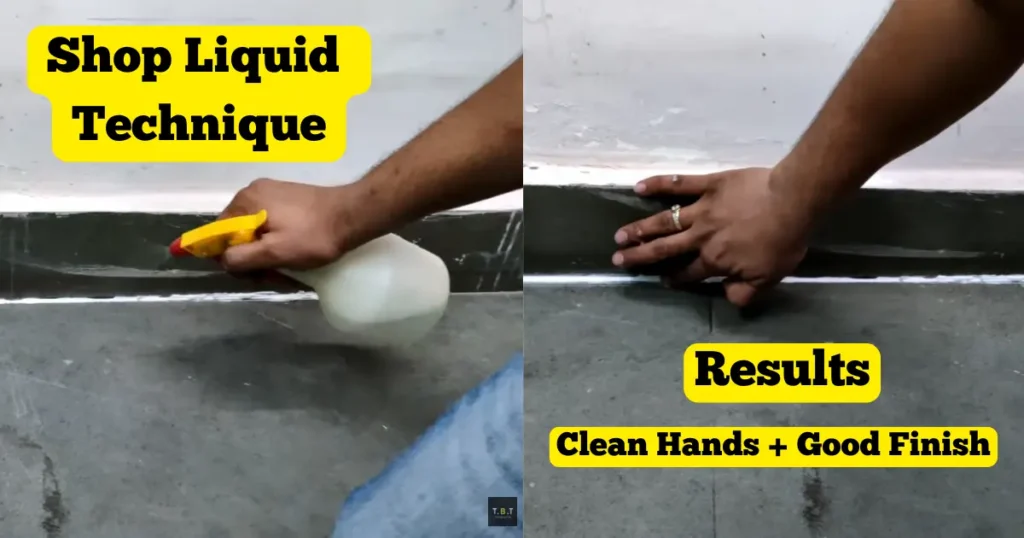
TBT Result
The soap solution method is faster but requires more practice to achieve consistent results.
Real World Comparison: Which Method Works Better?
| Method | Finish Quality | Speed | Beginner Friendly |
|---|---|---|---|
| Masking Tape | Excellent | Medium | Yes |
| Soap Solution | Very Good | Fast | Moderate |
Our Verdict
If appearance is your top priority, use the masking tape method.
If speed matters more and you already have some experience, the soap solution method is an excellent alternative.
TBT Pro Tip
One of the easiest ways to improve your results is to cut the nozzle smaller than you think you’ll need.
A smaller opening gives:
- Better control
- Less waste
- Cleaner lines
- Easier finishing
Many beginners make the opening too large and struggle to control the silicone flow.
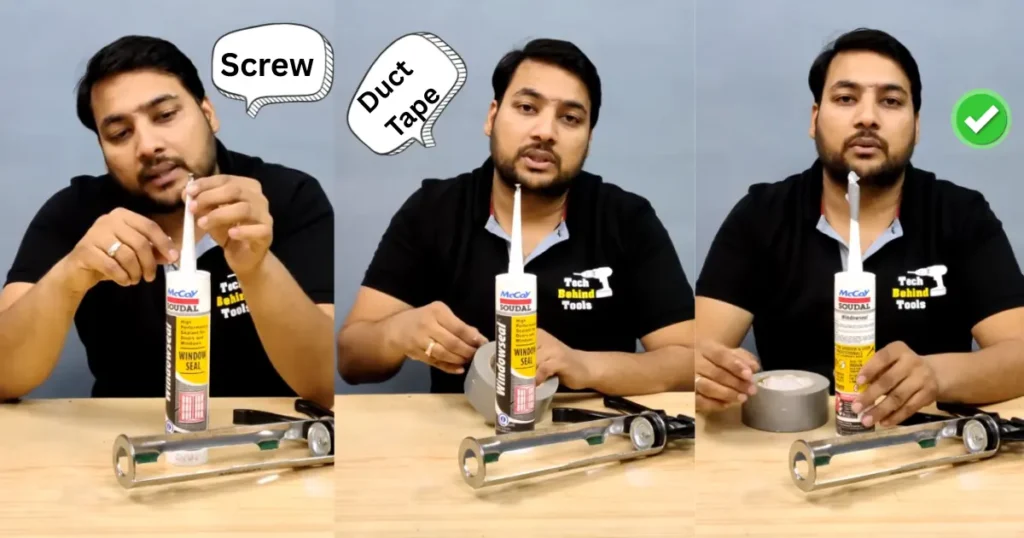
How To Store A Half-Used Silicone Cartridge
Partially used silicone cartridges often dry out before the next project.
A simple workshop trick is to insert a screw into the nozzle opening. This helps reduce air exposure and often keeps the silicone usable for much longer.
When you need the cartridge again, simply remove the screw, pull out any cured silicone, and continue using the cartridge.
You can also seal the nozzle using duct tape or masking tape, although the screw method generally works better.
Save Money Tip
Keep a few spare screws in your toolbox specifically for sealing partially used cartridges. It’s a simple habit that can reduce waste and save money over time.
Common Silicone Sealant Mistakes
Even good-quality silicone can produce poor results if it’s applied incorrectly.
Cutting The Nozzle Too Large
A large opening releases more silicone than most users can control.
Applying Silicone On Dirty Surfaces
Dust, grease, and moisture can prevent proper adhesion.
Waiting Too Long To Remove Masking Tape
Always remove masking tape while the silicone is still wet.
Trying To Rework Silicone After It Starts Curing
Once silicone begins to skin over, repeated touching usually makes the finish worse.
Products We Recommend
- Caulking Gun
- Silicone Sealant For Bathrooms & Kitchens
- Masking Tape
- Silicone Finishing Tool
- Utility Knife
Frequently Asked Questions
How long does silicone sealant take to dry?
Most silicone sealants become touch dry within a few hours, but full curing can take 24 to 48 hours depending on temperature, humidity, and bead thickness.
Can I apply silicone without a caulking gun?
Some small tubes can be applied manually, but standard cartridges require a caulking gun for proper control.
Why does my silicone look uneven?
Common causes include excessive nozzle size, inconsistent pressure, poor surface preparation, or attempting to smooth the bead after it has started curing.
Should I use masking tape every time?
Not necessarily. Many professionals don’t use tape, but it’s one of the easiest ways for beginners to achieve cleaner results.
Related Guides
- How To Drill Ceramic Tiles Without Cracking Them
- How To Drill Glass Safely
- How To Drill Metal Properly
- How To Change Drill Bits Correctly
- Best Caulking Guns For DIY & Professional Use
- Best Masking Tapes For Construction Projects
Watch Our Tool Reviews & Workshop Tips
Looking for hands-on demonstrations, tool comparisons, workshop tricks, and buying advice?
Visit the TechBehindTools YouTube channel for practical tutorials designed to help you complete projects more efficiently and avoid common mistakes.
Affiliate Disclosure
As an Amazon Associate, TechBehindTools may earn from qualifying purchases made through links on this page. This helps support our content and allows us to continue creating tool reviews, comparisons, buying guides, and workshop tutorials.
Final Verdict
Applying silicone sealant neatly isn’t about expensive tools or years of experience. It’s about preparation, technique, and patience.
For most DIY users, the masking tape method delivers the cleanest and most professional-looking results. Once you’re comfortable with the basics, the soap solution method can help you work faster while still achieving excellent results.
Take a few extra minutes to prepare the surface, cut the nozzle correctly, and choose the right finishing method. Those small steps make a huge difference in the final result and can save you from wasting both time and material.


